We got a brand-new, spanking pressure cooker as a wedding gift last October. Husband had been after me for a couple of months to try it out. It's a fancy-dandy German stove-top model that is built like a tank, made to last, shiny and durable. And boy, does it work well! Here's a recipe for the first ever thing I cooked in it. A standard pot roast a-la-50s style. Nothing fancy, and really easy. All in less than an hour cooking time.
People ask me: Why the pressure cooker? In short, it's fast and the food comes out moist and fork tender. If you don't always plan ahead and use the slow cooker. Use the pressure cooker -- your fast cooker friend!
Ingredients
3 lbs Boneless Chuck Roast
3 tbs Olive Oil
2 large Onions (Yellow - Chopped fine)
2 Cups Beef Stock
4 Carrots (Chopped into inch pieces -- about 2 Cups)
8-12 Red Bliss Potatoes (or Red Creamers) (chopped to 1- 1 1/2 inch sizes)
3-4 Celery Stalks (Chopped fine)
2 tbs Garlic
2 tbs Soy Sauce
2 tbs Worchestire sauce
salt
pepper
Salt/Pepper chuck roast
Combine beef stock, garlic, soy sauce, worchestire sauce and set aside
Heat olive oil in 8 qt pressure cooker on high. Sear chuck roast on all sides, careful not to burn. Do not flip multiple times. Be patient. Once you've seared, pour stock mixture in pressure cooker over the roast.
Add carrots, onions, celery, potatoes
Close pressure cooker and attain "high" pressure.
Cook at high pressure for 1 hour.
Release pressure according to manufacturer's directions.
I often describe myself as a good Cuban boy from Miami. I don't know why. I don't have the requisite jet black hair. I don't have a discernible accent in English. I don't follow baseball, eat seafood or follow the Dolphins football team. And the time I could describe myself as a boy evaporated a long time ago. But the Cuban moniker will stick with me until way after I'm dead.
First generation American (yes, my Latin-American friends, I know America is the entire continent, but you know what I mean), I grew up in South Florida constantly translating from English to Spanish and vice-versa for my parents and other relatives, navigating the waters in our adopted homeland. Even though I left Miami over 20 years ago (and have no plans on returning) I carry Miami within me, and with it, that Cuban culture that was pounded into my head each time my parents took me to a Jose Marti parade or blasted La Cubanisima radio full-volume (along with the requisite Radio Reloj). For this, I am thankful. The Cuban culture influences every aspect of my life -- especially my cooking. Enter, Memories of a Cuban Kitchen by Mary Urrutia Randelman, a solid cookbook of traditional Cuban recipes, interspersed with anecdotes from Randelman's life in pre-Castro Havana.
Randleman includes traditional recipes like Carne con Papas (Cuban Beef Stew), Picadillo (Cuban Beef Hash), Tamal en Cazuela (Cornmeal Stew), Ropa Vieja (Old Clothes - Flank Steak Hash in Tomato Sauce). Her presentation is straight forward, no nonsense and traditional. She also includes some of the more exotic Cuban recipes like Arroz con Chorizo (Rice with Chorizo), Tasajo a la Cubana (Stir-Fried Dried Beef) and Ensalada de Garbanzos y Pulpo (Chick-Pea and Octopus Salad). In short, this is one of the most complete, thorough collections of Cuban recipes I have found. Yes, traditional desserts are included too. There's a Flan recipe in there too!
A word to the uninitiated. Contrary to somewhat popular belief (every time I hear this I roll my eyes and clench my jaw) Cuban food is NOT generally spicy. If that's what you are looking for, stay away from this book and look to traditional Indian cuisine.
Picadillo, or Cuban Beef Hash, is that savory combination of ground beef and stuff. I say stuff because there are about as many different versions of Picadillo as there are people. Some people like it sweet, some spicy (not very many Cubans), and most like it savory. What follows below is the way you are most likely to eat it at my house. Unless, of course, I run out of something. Then, what you'll eat is an improvisation of whatever is around.
Picadillo takes a while. It takes a bit of time to get those potatoes to soften. Be patient. You are not going to overcook the meat--don't worry. It's also important to follow the stages below in order, otherwise the textures wont be right. You don't want mush.
A couple of notes. "Chopped small" is not the same as minced--I like texture. I like my Picadillo a bit wetter than most people. Also, I believe in easy, for the most part. I like using Badia. It's cheap, easy and good.
Ingredients
1 Cup Raisins
1/2 Cup Red Wine
2 tbs Olive Oil
1 1/2 Large Sweet Yellow Onion (Chopped Small)
1 Orange Bell Pepper (Chopped Small)
1 Red Bell Pepper (Chopped Small)
2tbs Minced Garlic
2tbs Badia Sazon Completa
2tsp Ground Black Pepper
1/2 tsp Ground Clove
1/2 tsp Asafoetida Powder (Don't know what this is? Look here: Asafoetida Powder)
2 lbs Ground Beef
2 15oz Cans Tomato Sauce
2 Pounds Yukon Gold Potatoes (Peeled and Chopped Medium-Small)
1 Cup Green Olives (I like Castlevetrano)
Salt to taste
I recommend a 5 quart non-stick pan. Everything in one pot. No sense in getting lots of things dirty. Those of you that are wondering what red wine to use, I use whatever I have around. Currently, we are drinking Apothic Red. We really like Apothic Dark, but that was a limited release. I am told that Apothic Dark is coming out again in the first quarter of 2014. Get it!
Soak raisins in red wine for at least an hour. Read that again. At least an hour. It is important that the raisins plump.
Sauté bell peppers and onions in the olive oil until soft on medium high heat.
Add garlic, Badia, black pepper, clove, asafoetida and stir. In about 15 seconds, you will note the frangrance change. When you do . . .
Add the ground beef and brown. Don't worry if not perfectly brown. Make sure to break up all the meat. Do your best.
Add the tomato sauce and stir.
Add raisins with the wine.
Bring to simmer.
Add potatoes.
Bring to simmer. (If already at simmer, continue)
Cover and reduce heat to low. Maintain low simmer. Cook until potatoes are tender, stirring occasionally.
Ten minutes before you call it "done," add olives. Stir. Wait. Skim any fat on top. Stir. Serve.
Rather than review the recipe in Best Loved Food of the '50s, suffice it to say that it was a dud. The batter was dry and there was no way the recipe was going to work when baked. I believe there was a serious printing error in the recipe. Do you want good Ginger Snaps? Here is MY recipe!
1 Cup Apple Butter (Yes, Apple Butter -- If you can't find, use Apple Sauce)
1/4 Cup Molasses
Preheat oven to 375 degrees F.
Spray cookie sheet with nonstick spray, or, better yet, use a silpat.
In large bowl sift together the dry ingredients.
Beat Sugar, Fresh Ginger and Butter together until well blended. It's very little butter. You will want to use a Stand Mixer if you have one on #4 for about 3 minutes. (My favorite: KitchenAid Artisan Stand Mixer)
Using a fork, work in the Apple Sauce and the Molasses.
Add the Flour mixture, 1/2 cup at a time, until well combined. If using the Stand Mixer, again, use setting #4. Careful! You don't want the flour exploding everywhere.
Make small, 3/4 inch balls of dough and space on silpat (or baking sheet) 1" apart. No need to flatten.
Bake for approximately 14 minutes.
Cool for approximately 1/2 hour on wire rack.
Why Apple Butter and not Apple Sauce? Simple. Apple Butter adds a deeper, richer flavor, and you wont have to use more molasses to get depth in the taste of your cookie!
By the way, check out the Favorite Things Page (off of the Home Page) for recommendations on Baking Sheets, Wire Racks, and other items. You'll be glad you did.
You've got to love a cookbook that has its own manifesto.
The Butch MAN-ifesto. Our objective is simple. We're men. Men who like cupcakes. Not the frilly pink-frosted sprinkles-and-unicorns kind of cupcakes. We make manly cupcakes. For manly men. (Butch Bakery|New York)
I stumbled across this book while browsing the virtual library shelves of my local online library catalog. I'm ashamed to say the title alone was too good to pass-up. Apparently, I'm a sucker for something that is smartly branded, and the juxtaposition between butch and bakery caught my eye. I put the book on hold and had it delivered to my local branch.
Written by David Arrick, a former asset-backed securities dealer on Wall Street, The Butch Bakery Cookbook comes in at a solid 192 pages with plenty of color pictures. According to the Butch Bakery website, when Arrick read a magazine article mentioning that cupcakes were a combination of everything "pink, sweet, cute and magical" he decided to take action and "butch it up." (Really, I have no comment.)
Upon scanning the table of contents I came across some unusual entries: Driller, Jack Hammer, Big Papi, Sweet Mama, Peppermint Patty, and Butch Meets Buttercream. Convinced I had actually checked-out a book on soft-core activities, I ventured forward with a bit of trepidation. Sure enough, past the hype and the attention-grabbing titles, The Butch Bakery Cookbook delivers solid-tasting cupcake recipes that will make most adults happy.
A word of warning, this is not a cookbook for teetotalers. The recipes include liberal use of brandy, bourbon, Bailey's, whiskey and all sorts of wonderful spirits that butch up prissy cupcakes and pack a punch. As some of you know, my office colleagues regularly demand that I bring baked-goods to work with me. I decided to try out the Sidecar recipe and not only was it a hit, I was also told that I should have brought in enough for each person in the office to have two cupcakes, rather than one. I reminded them that they were fortunate to have one cupcake, and snarled in their general directions.
So, what was in the Sidecar? Well, at press-time I had not received permission to post the recipe but I can tell you this: the Sidecar is a delicious cupcake that is comprised of a lemon cake, drenched in brandy, with a cointreau/brandy buttercream. Yes, it is as decadent as it sounds. And, it's like doing a shot and eating cake at the same time! Because none of the liquor is cooked-out, not only do you taste it, but you get that immediate contact buzz from the sugar and the alcohol.
If they behave, my office colleagues will soon be getting some B-52s (yellow cake/Bailey's buttercream) and some Really Hot Dogs (chile-spike devil's food cake/dark and white chocolate-chile buttercream). Yes, I broke down and bought the book. It was cheap. Last time I looked $8.00. You can get it here: The Butch Bakery Cookbook [Amazon Link].
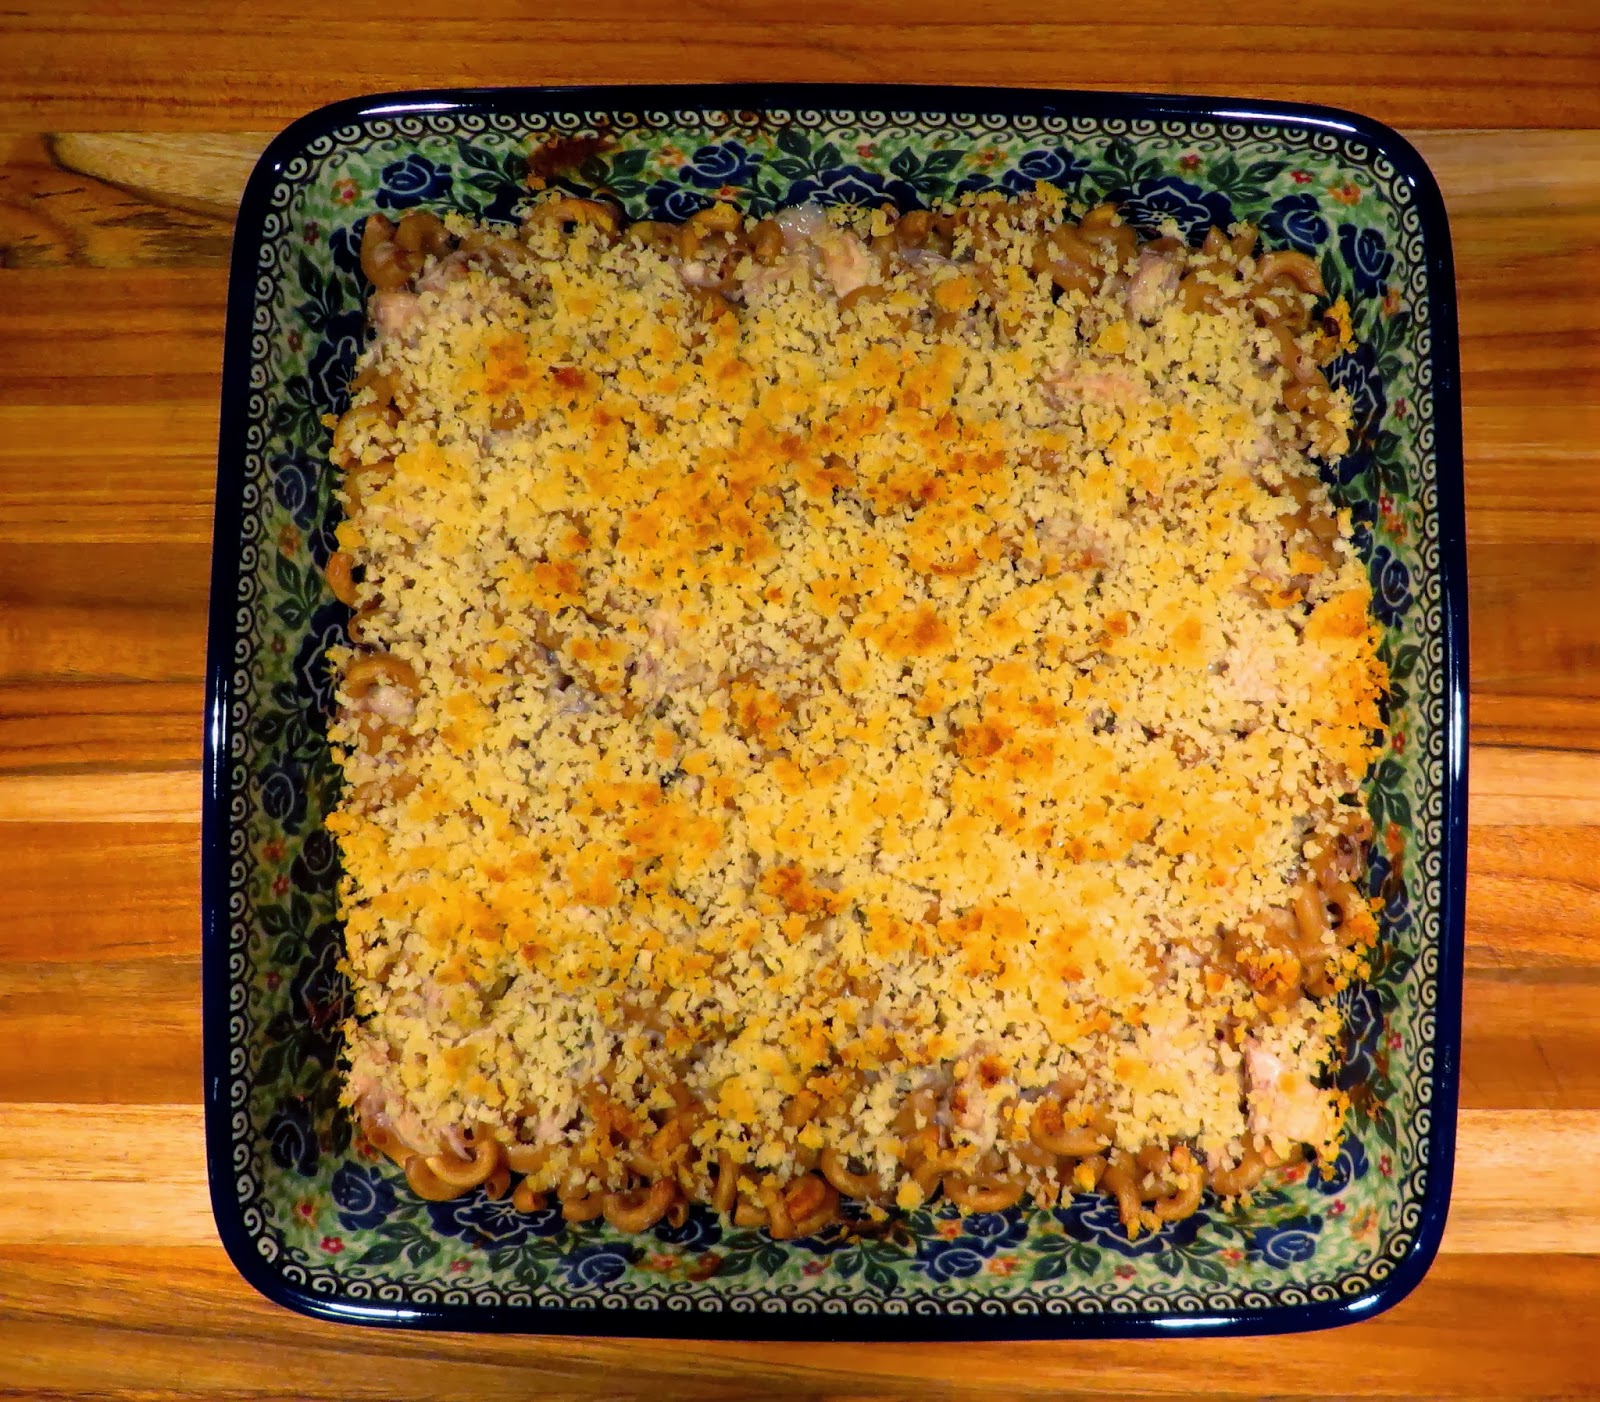
Our continuing retro adventure brings us to Chicken Tetrazzini. A comfort casserole if ever there was one. With this one, this year's cooking bible, Best Loved Food of the '50s, does not stray from the customary or the bland. Cooked chicken, salt, Cream of Mushroom Soup, cheese, bread crumbs, sherry and done. Nothing fancy. In the book's defense, the Tetrazzini cooked up rather easily and was tasty (once I doubled the salt and cheese) BLF50s seems to be in love with Cream of Mushroom soup. It uses it as a base for nearly every casserole recipe. When combined with the sherry, it turned a light purple which was a bit off-putting, but the color seemed to cook-off (or was it covered with bread crumbs?)
I know that '50s cooking was all about using new products (hence the canned mushroom soup) and expediency, but when it comes to taste, I don't believe in skimping. So, I found a recipe that requires a bit of work, but is well-worth the effort, trust me. Yes, you basically create the cream of mushroom from scratch, but hey, no pain, no gourmet!
By the way, if you don't want to buy rotisserie chicken, or make one yourself, I find that poached chicken works just as well in the Tetrazzini. I also have a pretty fool-proof method of poaching. Click on the link to see: How to Poach Chicken.
Have a Tetrazzini recipe you want to share?
Got some thoughts on your mind? Let me know in the comments.
Pour two cups of chicken broth into a wide high-sided skillet.
Place onions, carrots, and celery ribs in chicken broth.
Bring to boil.
When stock is boiling, put in 2 to 4 chicken breasts and cover.
Reduce heat and simmer for 7 to 8 minutes.
Flip chicken breasts over.
Simmer for an additional 7 to 8 minutes.
Depending on the thickness of the chicken breasts, they should be cooked through.
How do you know the breasts are done? With an instant-read thermometer check the internal temperature. At the thickest point the breast should be at least 165 degrees Fahrenheit.
Guest blogger, my hunky nephew Paul, is writing for us today. Paul is a mixologist at one of our local watering holes and is currently single. Yes, I meddle in my nephew's personal life. Serious inquiries should inbox me privately. <wink> ---- Known as "the drinking man's drink," it was the father to the "Martinez cocktail," which was the father to the popular "Martini." So, yeah, it's the martini's grand-daddy -- that ever so popular and sexy concoction of gin and vermouth. In fact, the Manhattan could be the reason we use vermouth in cocktails today. The Manhattan was created in the late 1800's, and due to vermouth's increasing popularity at the time, may bartenders were experimenting with it. It is probable that many bartenders created the same cocktail at the same time. One theory is that the cocktail was created at the Manhattan club in New York City in 1874, when Jennie Churchill (Mother of Winston) threw a party for the newly elected Governor. Now, to the nitty-gritty. The cocktail falls into the French-Italian family of cocktails. Because New York was a rye town at the time, the original recipe calls for rye whiskey. Other adaptations use bourbon (the South) or brandy (the Midwest). We're going to do it the way it was intended: The Manhattan
2 oz Rye Whiskey (I use Old Overholt - Cheap and Good for Cocktails)
3/4 Oz Sweet Vermouth (I use Dolin)
2 Dashes Angostura Bitters
Maraschino Cherry
Combine all ingredients in a mixing glass. Add ice. Stir (preferably with a bar spoon), minimum of 20 revolutions, no more than 25. The idea is to chill the drink, dilute the whisky and NOT water the cocktail down. Strain into a chilled martini or coupe glass. Garnish with cherry.
WARNING: Vermouth is wine. It will go bad, even though it is fortified. When not in use, refrigerate, it will keep longer. Generally, you can stretch it to a week.
Note: I make my own cherries because most of the ones you buy are brined, bleached, and colored to that disposable bright red. The recipe? I'll share that in the future. For now, you can buy Luxardo Brand Maraschino Cherries or any brandied Maraschino Cherries. Just avoid anything bright red. That's garbage.
Try the recipe. Let Uncle Alex know what you think.
Also known as Hing, Asafoetida (Asafetida) is a well known ingredient in Indian cooking. Before you open the spice bottle however, prepare yourself, this thing has a very pungent odor. In short, if spice bottles could fart, this is what they would smell like!
So, given the pungent odor, why is this spice fart one of my favorite things? Well, a bit more background first. Asafoetida is made from the resin of the giant fennel plant. It is also known as stinking gum and Devil's dung among its more colorful names. In addition to cooking, it has been used for its medicinal properties treating everything from flatulence to bronchitis. In Jamaica, its used to prevent spirits from entering a baby's skull.
I use it in my kitchen, making sure to keep it in a tightly sealed jar, and running the kitchen exhaust fan whenever I open the spice bottle. But, when I use it in my cooking (and not to ward of evil spirits), ooh la la, what a difference a spice fart makes!
Please, don't be foolish enough to put it on your tongue straight up. Asafoetida is a combination spice. When added to food and used in combination with other spices, the vomit-inducing sulfur smell gives way to a garlicky-leeky-earthy yummy goodness that brings out that umami flavor we all love. It adds depth to stews, lentils, beans, breads, while working in the background, accenting whatever it is you've already added to your recipe. Like most medicine, we don't know quite how it works, but we know it's working! You can also use it as a featured spice, dominating your recipe, bringing an earthier, heavier taste, to whatever your complementing.
My secret? 1-2 teaspoon(s) in beef stew. Don't tell anyone.
Oh! Yes, the smell goes away rather quickly, as you cook. The spice fart fades away, leaving nothing but the smell of goooood cooking!
Have you used Asafoetida? What have your results been? Let me know in the comments.
Before we begin, you can get the recipe here: Fudge Recipe I've done my homework and it's all over the internet. I think it's pretty safe to say the recipe has entered the public domain.
Wow! I had high-hopes for this recipe. It is a brainless, no-nonsense, easy as pie (although we all know pie is NOT easy), quickie fudge recipe. The problem, however, is that you get exactly what you put in. The final fudge product, beautiful to look at, is so sweet you may want to take a Silkwood Shower after you have tasted it. The taste lingers for hours.
This is NOT a complex, deep rich chocolate for the chocolate connoisseur. It is the type of fudge you give your kids if you want them bouncing off of the walls for the next six hours -- chase it with coffee, that will help.
In all seriousness, the resulting fudge is ultra-smooth, and my office taste-test yielded some varying degrees of likeability: from "I love it, you see me licking my fingers, don't you?" to, "I think I'll save it for my son." You get the picture. While still protecting the innocent, I can tell you that the "finger-licker" was an attorney. Somebody's mom added: "Que rico!" Further, I will say not.
So, I've thought about how to fix this to my liking. Maybe by adding some ginger, or nutmeg, or tabasco, something to get rid of the evaporated milk taste. What do you think? Leave me some comments. Let me know.
Every now and again we'll take a break from the '50s and highlight a recipe that is tried and true and a favorite from our kitchen. Today, it's the Cuban Quiche. You read it correctly, the Cuban Quiche.
This is what comes of a Cuban boy from Miami in the kitchen with too much time on his hands. You never know what you're going to get. I love Cuban picadillo. For the uninitiated, picadillo is a savory ground beef mixture that is usually eaten with rice and has as many variations as there are people who make it. (I'll post my recipe sometime in the future.) One day, I was sitting around minding my own business, and a strange thought popped into my head. What would happen if I combined the savory/tropical taste of picadillo with the hearty richness of quiche? I had had meat quiche before (Quiche Lorraine anyone?) but it was to fancy and delicate. I wanted something strong and aggressive. Well, I think I hit pay dirt! Let me know what you think in the comments:
Ingredients
5 eggs (room temperature)
1/2 cup Whole Milk
2 tbs Balsamic Vinegar (If you can get this: Beekman Black Drizzle, it is AMAZING!)
2 Cups Sharp Cheddar Cheese, finely grated
1 1/2 Cup Gouda Cheese, finely grated
1 tbs All Purpose Flour
1 Pie Crust (I like the Pillsbury Refrigerated Pie Crust)
1 lb Ground Beef
1 Bell Pepper (Red), minced
1 Yellow Onion (Large), minced
4 Garlic Cloves, minced
2 tbsp olive oil
2 tbs Badia Sazon Completa
1 tsp Kosher Salt -
Take the eggs, milk, balsamic vinegar, flour, and salt and combine in a medium bowl. Whisk together until all the egg yolks are broken and the ingredients are well-combined. Add cheeses, beat further. Now you are starting to understand why it was important that the cheeses where FINELY grated. The finer the easier it is to incorporate and the better the Quiche will turn out! You do not have to beat it to death, but ensure that you have a nice, gooey, consistent mixture. It is important that all the ingredients are evenly distributed. Set aside.
Spread pie shell over a 9 inch prepared (butter, Pam, whatever you prefer) pie pan. It is essential that you blind bake the pie shell. If you do not have experience blind baking a pie shell, click on the instructional video below, it is an EXCELLENT tutorial from America's Test Kitchen.
While the pie shell is blind baking, saute onions, and bell pepper over medium-high heat until onions are translucent and bell pepper is soft. Add garlic and saute further for about 10 seconds until garlic blooms (you'll know, the smell will be incredible). Add the Badia Sazon Completa and stir. Now, add the ground beef and brown, taking care to break up and chunks that may form. Ensure that ground been pieces are as small as possible and cook through.
Take the cooked beef and our into the now cooked pie shell ensuring that it is equally distributed along the bottom of the shell. You want to make sure you get beef in every bite. Now, pour the egg mixture over the beef. Bake at 350 degrees for 40 to 45 minutes depending on your oven. They are all temperamental.
Use the toothpick test to test for doneness:
Any questions? Ask away! Make sure you let me know what you think in the comments!
COMBINE sugar, evaporated milk, butter and salt in medium, heavy-duty saucepan. Bring to a full rolling boil over medium heat, stirring constantly. Boil, stirring constantly, for 4 to 5 minutes. Remove from heat.
STIR in marshmallows, morsels, nuts and vanilla extract. Stir vigorously for 1 minute or until marshmallows are melted. Pour into prepared baking pan; refrigerate for 2 hours or until firm. Lift from pan; remove foil. Cut into 48 pieces.
The Flavor Bible, originally published by Little, Brown and Company in 2008, is a necessary tool for anyone who is serious about, dare I say it, flavor.
Those of you that know me, know that I had gastric bypass surgery in February of 2013 (losing a whopping 147 lbs to date!) and that I can only eat very small portions of food at any one sitting -- less than a cup (in total) of consumption at any meal. Yes, you read that correctly. A cup! This makes being a foodie very difficult. And, yes, I still consider myself a foodie. Although I cannot inhale the voluminous amounts of food I was accustomed to eating, I enjoy the food I eat and make every bite count.
For me, the key to making every bite count is ensuring that the flavors pop guaranteeing the perpetual party in my mouth. Well, this is not easy. Although I am a solid cook -- some would say awesome (I pay them) -- it is difficult to come up with flavor combinations that aren't boring, expensive, and/or repetitive. Enter The Flavor Bible.
The Flavor Bible answers the age old question: What goes with what? Don't know what to add to pumpkin to make it pop? Check The Flavor Bible (Answer: bay leaf). Want to know what flavor affinities are present in Georgian (Russian) cuisine? Check The Flavor Bible. (Answer: coriander + dill + fenugreek (blue) + garlic + red peppers + walnuts). Did you know chicken goes well with cinnamon? That you should use marjoram in egg dishes? That navy beans go well with YELLOW onions? OK, I think I've made my point.
From the mundane to the exotic, look up an ingredient in the matching tables and you will get the wisdom of some of the worlds most celebrated chefs to guide you, whether you want to enhance a recipe or are creating something from scratch. From personal experience I can tell you that pumpkin/bay leaf trick really works. I made some pumpkin cookies the other day that I had made a zillion times before. But, this time I added a bay leaf to the pumpkin mixture and sauteed for a while before adding to the batter. The pumpkin flavor was enhanced tremendously and the cookies were better than ever before! Yes, you need to remove the bay leaf. ;)
I turn to this book again and again. Instead of keeping it in the library, I keep it in my kitchen. My one regret is that it took me 5 years to find it. You can check it out here: The Flavor Bible
I hate big parties for New Year's Eve. Well, truth be told, I really don't care for big parties at all. I like small groups that stay around 6-10 people. They are much easier to cook for, you can talk to everyone, and, as host, you can make sure everybody has a good time. Fortunately for the husband and me, we had the best of all worlds for New Year's. A small, intimate party, hosted by somebody else: our good friends Rebecca and Jay!
Rebecca is a wonderful mixologist. She can pour a stiff drink that wont hit you until it's too late for you to realize what you've done. Well, she did me in on New Year's Eve. "What can I get you?" She asked. "Make me something sweet," I answered. What happened then is still hazy, but I had one of the best drinks I've ever had - and the one drink gave me a buzz that lasted for hours. Here's the recipe for the Stiletto. Enjoy!
Fill cocktail shaker with the cracked ice and add Amaretto, Bourbon, Lemon and Simple Syrup. Shake Vigorously to blend and chill. Divide the ice cubes between two old-fashioned glasses. Strain half the mixture into each glass. Garnish with Lemon Peels. Rub Peel round rim of glass then drop in! Serves 2.
By the way, Rebecca inverted the recipe in the drink she gave to me, doubling the Bourbon and singling the Amaretto. All I can say is WOW!
The recipe came from: Highballs and High Heels. Click on the name if you want to purchase the book.
When I first looked at the title: Hungarian Goulash Casserole, I was excited! Love Goulash! Love Casserole!
Sad to say, I was disappointed with the results. Against my better judgment, I followed the directions on meatball preparation strictly -- the recipe called for browning in a skillet, rather than braising. The result, meatballs that were dry. Fortunately, although I did prepare them as directed, I ignored the seasoning recommendations and came up with a Hungarian Meatball that was very tasty! If you want the recipe, the link is below.
By the way, when using Paprika, the only thing that made this casserole "Hungarian" (as far as the book is concerned, LOL), I normally use a Paprika Paste that I find combines better with ingredients and brings out an earthy taste. It's easy to prepare. I've added a link below.
One last note, as I mentioned below, we do love Goulash, but this wasn't it. There is a great recipe for Goulash that, if followed closely, will yield excellent, traditional results. It's from Saveur (bow). Link at the bottom of the page.
Combine all ingredients until well mixed. Make 1 inch meatballs. Braise meatballs until done. NOTE: When braising, lightly fry only, then stew in favorite liquid (I prefer a 1:1 redwine/stock combination) to prevent drying.
Use as a dip, condiment, or in place of Paprika when needed in a recipe. I especially like to use the paste because it combines more easily with other ingredients. Also, because I'm in control of what I put in, I can control how spicy it is! The Roasted Bell Peppers bring out the Paprika's earth flavors.
Ingredients
2 Roasted Bell Peppers (Any Color Except Green)
2 tbs Hot Hungarian Paprika
2 tbs Sweet Paprika
4 tbs Ketchup
3 tbs Red Wine Vinegar
2 cloves of Garlic
Throw everything in the blender and process on lowest setting possible until you have a nice, thick paste. Makes approximately 1 pint. You need to refrigerate. At my house, it's gone in about a week. We put it on everything.
Let there be meatballs! And noodles. And sour cream. And Cream of Celery soup. Yeah, you didn't see that one coming did you?
This is comfort food at its best. Egg noodles, cream sauce and made-from-scratch pork meatballs. A little baking action and then you're done.
I should tell you a little about my family. My husband, AKA Saint Craig, is the sweetest guy ever. And he L-O-V-E-S food. He also loves all his girls. All four of us. Hence, the "Saint" moniker and the apologies he hears everywhere we go. "Oh, you have THREE daughters? I'm so sorry."
Alexis is my oldest daughter. She's a Daddy's girl and L-O-V-E-S food too. Ashley, my middle daughter, is a budding chef. I bet she'll share with us some of her cupcake recipes this year. Addison is our youngest. She has food fixations. One week she'll eat only blueberries. Another only spaghetti. This week it's peanut butter. She normally looks at dinner with an evil eye if it doesn't contain her food of the week. We're trying to break her of this.
So the Hungarian Ghoulash was a hit. I didn't tweak the recipe at all. Mostly because it's Friday and I'm beat. The meatballs were very, very good. The noodles had a soothing element to them. The two older girls had seconds. The youngest wanted to know when dessert was. Hubby said it was a keeper.
The reviews:
Boy, you can really taste the Hungarians! -Hubby
Tasty yumminess! -Alexis
Dug the meatballs! -Ashley
I have a cookie now? - Addison
Rating: 8 thumbs up! (Alexis, Ashley, Craig - 2 thumbs each. Mommy & Addison 1 each.) I guessed for her, and I found it a bit bland.
Addison's star rating based on the following exchange:
Addison, do you like it? No.
Do you want more? Yes.
Do you like it? Yes.
Do you want more? No.
Yes. I know that cooking in the Fifties was all about convenience and opening jars/cans. But, as you will learn from my postings, if I have it at home, can substitute, or make-up, I'm not going to the store. So, when the Tropical Pork Chops recipe called for 1/2 cup of prepared sweet and sour sauce, I looked around the house to see what I could come up with. I think you will appreciate the results. Let me know.
Here is what you will need:
4 tbs Pineapple Juice
4 tbs Ketchup (or tomato sauce - whatever you have closest to you)
1/2 cup Red Wine Vinegar (Apple Cider Vinegar will work too, but not as well)
1/4 cup Light Brown Sugar (Regular Sugar will work too, taste will be brighter)
1/2 tsp Kosher Salt (OR 1/4 tsp table salt, you decide)
1 tsp Grated Fresh Ginger (OR 1/4 tsp powdered Ginger)
1 tbs Cornstarch (dissolved in 3 tbs water)
Combine pineapple juice, ketchup, vinegar, sugar, salt and ginger in a small saucepan whisking periodically, bringing to slow simmer on medium heat -- just enough to melt the sugar.
When you have the simmer going, introduce the Cornstarch solution and whisk slowly until the liquid becomes a bit syrupy and develops a glossy sheen. Note, it WILL NOT tremendously thicken on the stove. Simmer for about an additional 2 minutes. Remove from heat and let stand until liquid returns to room temperature.
Once at room temperature, store in favorite container and refrigerate until use. The sauce will thicken a bit more in the refrigerator, but it will not become gooey. If you're going to use it for dipping, you may want to pull it out 1/2 hour early to let it get to room temperature.
Wow! Alex's pork chops look delicious! I totally love the crushed pineapple he used and that rub sounds divine. My version is a little more subdued but was a huge hit with the kids (all three of them!) and the hubby loved it too.
I only made two slight modifications to the recipe. First, I added freshly ground pepper while the pork chops were searing. The recipe didn't call for any salt or pepper and I was worried it would be bland. Second, after the pork chops had simmered for about 7-8 minutes in the "tropical sauce," I sliced them on a cutting board and added the slices back into the sauce and simmered them another 5 minutes.
My husband, a self-proclaimed pork afficionado, is not particularly fond of dry pork and I knew my girls would like the sweet taste to travel all the way through. The result was a juicy, sweet tang in every bite. Rice and a strawberry/blackberry medley finished off this VERY easy and kid-friendly meal.
The results?
"Delicious, excellent, extravagant!"- Alexis
"Yummy, sweet and fabulous!" - Ashley
"More rice!" - Addison
"I would sell ALMOST everything I own just to eat it again!" - Hubby
I thought I'd start off easy by tackling a "dump and serve" recipe from our book of 1950s cuisine. Although the name was inviting, the recipe called for little more than taking some prepared sweet and sour sauce, combining it with pineapple chunks, and dumping the concoction over some browned pork chops. Completely uninspired and totally pedestrian. Although I've got to give it massive props for quick and easy, and, yes, the result would have yielded a perfectly edible set of pan-fried chops, the experience would have left me somewhat empty inside -- and somehow, the blasé recipe did not conjure a Luscious Luau in my mind.
In four simple steps, the recipe wanted us to:
Combine pineapple chunks, sweet and sour sauce, raisins and brown sugar in a bowl.
Brown chops.
Dump combination sauce over chops and simmer until cooked -- about 10 minutes.
Serve over cous cous (I doubt they had this in the 50s, in the U.S., but what can you do?)
So, what could I do that was simple and at the same time increase the flavor quotient? I added a flavor-paste rub. Before browning the chops (which were not chops at all but a chopped pork loin), I dosed them with a rub designed to bring out a Luscious Luau flavor.
Combine all ingredients in a small bowl and form a paste. Take the paste and spread it over both sides of the chops! Put the chops in the refrigerator (covered or it they will stink up the fridge) for at least two hours.
By the way, if you don't have pork chops, relax. I didn't have pork chops at home but I did have a 1 1/2 lb pork loin. Here's what I did:
Take the loin and cut it in half, leaving you with two even cuts.
Take those halves, and slice them in half again for four "chops."
Presto! Four "Chops." As long as you don't over-cook them (internal temperature 145 degrees) they will be moist, juicy and tender.
Eagle-eyed readers will have noticed that I used crushed pineapple rather than pineapple chunks. Well, I didn't have any chunks. I'm over it. Are you? Use what you have. Repeat with me. Use what you have. Not surprisingly, I found that the crushed pineapple combined very well with the cous cous.
Oh! Before I forget, I didn't have any sweet and sour sauce either -- I'll post that recipe for you tomorrow. Who needs store-bought?